Showing posts with label Decorating. Show all posts

Thursday, April 2, 2020

Peer to peer veterans

We have a very active peer to peer veterans group in our area. Chris got involved this year and I got to go along on one of the project days.

It was a painting and pizza party. A bunch of veterans and family getting together to goof off, talk, and support each other. It’s amazing what gets shared when you’re relaxed and having fun.

This took place in February before all the social distancing went into effect. And I’m glad it did; now that people are self-isolating, having a group of folks that you can call up and chat with is incredibly helpful.

Plus it was just fun. Here is what I painted.


Cute, huh? It’s hanging by the front door. Chris (who is a much better artist than I) painted a more Autumnal scene so you’ll just have to wait for September to see his.

Monday, September 19, 2016

Painting the pop door

See? I said more decorating would occur...

Chris decided the outside pop door needed some help. The chickens decided he did.

Heading over to check out the artwork
"Hi. Whatcha doing?"
"He says he's painting a chicken..."
"A chicken? What chicken???"
"That chicken?"
"I'm prettier than that. Paint me!"
"What do you girls think?" "It's got no face!"
"Shhh, don't rush him"
"Bah. Maybe if I'm closer it'll help"
"Put a little more red in the wattle"

Friday, June 26, 2015

The porch bed

One of the things I very fondly remember from my childhood is spending the night out on the sleeping porch. So I really wanted a comfy spot on the porch for napping the day away. We got a bunch of pallets, a futon mattress, and set up a spot. It was wonderful! 

Looking for that darn chipmunk
Except the pallets sat directly on the porch slab and leaves would accumulate underneath. And then one day a chipmunk went under there and I realized we were going to have vermin trouble before too much longer.

Accumulated ick
So we figured out the height we wanted and cut some old landscape timbers into legs. They're stacked high enough that even the dog can get under the bed (ha! take that chippy) and it's easy to blow out any leaves that get under there.

Stacked timbers for legs are a nice design
We also cut down the pallets that form the back rest so they're not quite so looming. I still need to sew up some pillow covers and we'll probably put a shelf on the back rest, but it's so much better already! And it's perfect for napping.

Monday, November 17, 2014

What to do with those Halloween pumpkins...

So, what do you do with your Halloween pumpkin once the holiday has passed? I thought it would make a nifty bird feeder!

Step 1 - cut it in half. That's pretty much the only step.
I threaded baling twine through some holes that I made with a screwdriver (this is a very exact process, isn't it?) and then tied the twine to sticks to get that special rustic look.

Hung it on a shepherd's hook, filled it with sun flower seeds, and voila! Attracted some birds.
Chickadee!
Not at all shy. I'm a few feet away.

They like our purchased feeder too.
 I like how the orange pumpkin stands out against the fading Autumn colors. Bright and happy.
See, rustic.
Cooper likes the dropped seeds.

Saturday, April 6, 2013

Stairs, lights, and rugs - oh my!

While I was out of town on a shopping trip with my sister, Chris got stairs up! They’ve got the construction treads on them still as we don’t have the wood cut for the finished treads, but oh! How awesome to be able to carry boxes up and down stairs instead of a ladder. It’s the little things in life, ya know?


One stringer up and starting the landing

And we have stairs!

Future closet under stairs
The cat loves them by the way. She’s going to be very disappointed when we put the back on them. We won’t leave them open simply because we need the storage space and that’s a very deep closet-to-be. Too bad, as I kind of like the look. But when you build on a slab and give up all that awesome basement storage, you quickly realize that inside storage is at a premium.


Cat staring through stairs - her new favorite activity
Some other stuff that we’ve been up to:

Put shelves in the freezer storage closet off the pantry. So I’m making great progress in unpacking all my cooking gear.


Shelves to left go all the way to floor
Set up a new chrome shelving unit in the kitchen that’s much prettier than the plastic one we had there. Plus it’s bigger – useful and good looking! The other storage units are being set up in the future upstairs bathroom which is going to be a temporary storage space.

Easy assembly

All filled up
Put up a new kitchen light in the middle of the room. Went down to IKEA to buy some functional/pretty stuff like living room rugs and the aforementioned light. Okay, I managed to buy some other stuff too, but since they’re not installed yet, you’ll just have to wait for another post.


A very subtle new light

Not so subtle rugs
 And here's a sneak peak at our bathroom sink design:

Sink parts
 Makes a lot more sense when it's assembled...

Rough assembly
We dry-fitted it to make sure we liked it and to make sure we had all the pieces we needed. Turns out we needed some unions that would allow the last pipes fit together properly. So the test run was a success in that it pointed out we needed to do a bit more work. The sink is white porcelain and will sit in the center; on either side will be a slab of wood that we finish with a marine varnish for durability. I think it's going to look awesome.


We’re also doing road maintenance. Mud season is upon us and we’ve sustained quite a bit of damage from truck traffic. So the road needs to be smoothed and new fill brought in. We’re also going to put down some landscaping fabric (or something similar) to help create a water barrier.


They're even worse than they look here
 So that’s latest. Spring is finally coming and all the outdoor tasks start as well. Looking forward to doing some light gardening and building a stone patio.


Wednesday, March 6, 2013

Photo update!

I promised a photo update in the cat-woke-me-up post. And here I am, fulfilling my promise. But first, a photo of the rotten-one herself. Doesn't she look innocent? She loves the new house as it has many places to hide and jump out of as well as things to run around, over, and through. She has not asked to go outside since we got here - extremely unusual for this wild kitty.

Taking a snooze of her favorite rug
This is one of the cracker jar lights that I stenciled and frosted. They look great although it's really hard to get a good photo. Either you see the bulb too easily or the frosting whites out. In real life, they are subtly obvious - an oxymoron I know.

Cracker jar light
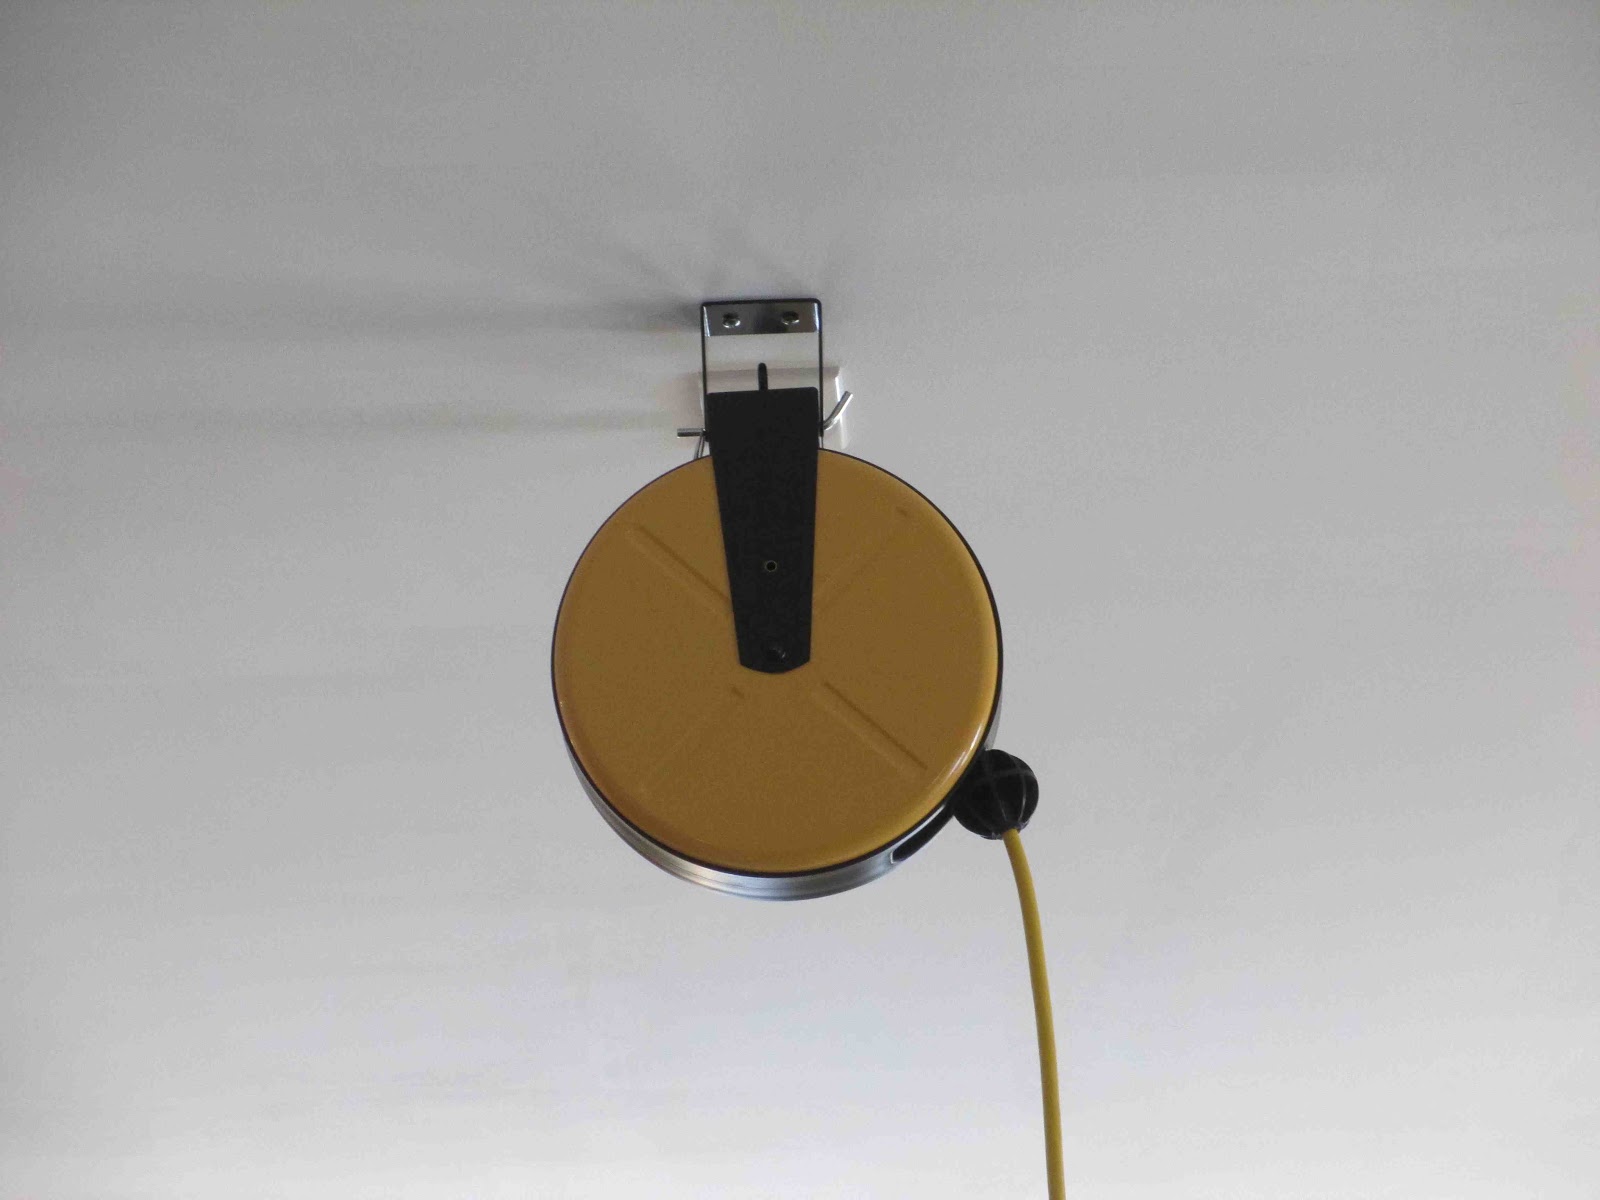
 To get power to the future island we opted not to run conduit through the slab. I didn't want an outlet in the middle of the floor in case I changed my mind about having an island. But I very badly wanted the ability to have power there. So we put an outlet in the ceiling - but how do you reach it to plug in your mixer? You buy a retractable cord reel of course.

Retractable cord reel
It fits perfectly with my "industrial farmhouse" esthetic. Or it will once I actually decorate enough to have an industrial farmhouse esthetic...

You can adjust the amount of cord hanging down too
You just reach up and grab the cord, pull it down to plug in your stuff, and then give it a tug to retract it when you're done.

This is one of the lights I got from Habitat for Humanity Restore. It's awesome. A large flush mount ceiling light rewired by my awesome electricians.

Metal, glass, and cast ceramic
 It holds four CFL bulbs and glows a wonderful golden tone. I was going to dry paint the metal to highlight the detailing but I don't think I need to now. I do need to do something with the finial. Maybe the same color as the wall? I know I don't want it dark but I'm not thrilled with the grungy cream color that's on it now. Huh. I'll come up with something.

Look at that detail!

Tuesday, February 26, 2013

What to do when the cat wakes you up at 1:30AM

The obvious answer is go back to sleep. What I actually did was get up and pack for moving day. However after a morning (night?) of packing and an afternoon hauling and unloading stuff, I crashed at 7PM last night. Still, it was a pretty darn productive day!

The electricians have been busily installing lights and switches and outlet covers. I had picked up a couple of antique lights at the Habitat for Humanity Restore (if you've never gone to one of these, you definitely should) and we determined that one base was a dead loss and one had to be gutted and new hardware installed. I bought a new base for the globe and the electrician took care of the other. Now both are up and I love them!

My cracker jar lights also came out great. I will not have to worry about casting shadows over my work zones in this new kitchen. And the bee stencils really show well. I used glass frosting spray paint rather than etching medium on these and it worked really well. It does however scratch rather easily. For lights that won't be handled often, that's okay, but if I was going to do a decorative jar for counter use I'd definitely use the real etching stuff.

The industrial outlet over the island-to-be is so cool. I smile every time I look at it. And we installed it to plug in rather than be hardwired just in case I stop smiling sometime in the future. It will be easy to take down if I ever change my mind.

I had pictures to go with each of these paragraphs and managed to lose them. Camera fail; argh. So taking replacement pics is definitely on the agenda.


Wednesday, February 20, 2013

And now we're painting

We're moving all our worldly possessions this weekend and wanted to get paint on Beech House before we filled it up with stuff. Went up yesterday with paint colors in hand, bought much paint, and got started. Succeeded in getting two coats of paint downstairs and one upstairs. Ran out of time for more but that's an excellent start.

We have used our neutral paint color on three buildings now - and it looks different on all three. We like that it's a chameleon and turns shade depending on the lighting. At the moment it's a bit browner than I'd expected but we'll see what different lighting conditions bring. Plus furniture and accessories always have an impact as well. 

The main color
Chris has a power painter that sprays the paint onto the roller and makes it all go much faster. He got the big room done in the amount of time it took me to do the bathroom and half the pantry.
Well used machine
The only room that I decided to paint a different shade is the DS bathroom. I went with a very dark shade of purplish-grey and I absolutely love it. We'll have slate tile in the shower surround, white fixtures (including the big soaking tub), and brushed nickel lights and bars. I was going to do a colored trim but now that I see the walls I've decided to go with a bright white trim instead. It'll make everything pop and I'm so thrilled with how this color came out!

Dramatic colors - ooooh
And it decided to snow a bit while we were there. Big fluffy flakes that didn't last very long but were oh so pretty. And next week I'll be able to sit on the sofa, have a cup of coffee, and just watch it coming down instead of having to get in the truck and drive back to get another load of stuff. Ahhh.

Pretty snow (and I have to get rid of those railings!)


Tuesday, September 18, 2012

The other birdhouse

The second stair post has been patiently waiting for me to paint it. I finally got around to it and Chris put on the little roof to boot. 

Front door

Single story and condo
 So the two posts are officially decorated. Fun to do these little things as a break from the house build.
Fewer doors on this one
 Chris is in the background putting our new mailbox together.
Pretty darn cute
Once the big house is built the Nest will be our guest cottage. I hope our visitors enjoy the good vibes that we've created there.


Sunday, September 9, 2012

Downstairs bathroom

Since the first project post-framing (and insulating and drywalling) will be to get a functioning bathroom, I've been looking at tile ideas. We're tiling the shower stall (4' x 6') and I really like the look of slate; can't say I much care for the price per square foot though. 

Looking at various and sundry tile shops, I found a good decorating to cost compromise at Home Depot. Real slate for the floor, belt line, and edging but ceramic "slate-look" tiles for the walls. Here is the mosaic that will go on the stall floor and decorative spots (I've provided a link but have no idea if it'll actually work - still learning this blogger stuff!):
Link
The 1"x2" size is great for getting a good grip on the shower floor and since this shower won't be used that much I'm willing to take on the extra work of re-sealing the stone occasionally. I actually considered using real stone from the property but was concerned it would be sharp on bare toes. This has been tumbled to round the edges a bit and should be more comfortable to stand on. 

The ceramic tiles for the walls have a slate look. Unfortunately this photo looks more brown than the grey color it is in real life (which is why I have such a hard time buying decorating items off the internet; colors just don't show true depending on your screen).

Link
When the two are next to each other in real life, they pick up the subtle shading beautifully. 

A black semi-transparent stain on the wood cabinetry is planned and the fixtures will be white. I think it's going to come together great.

Saturday, July 21, 2012

Round Lake Antique Weekend

We spent the morning at the Round Lake Antique festival. Gorgeous day and lots of vendors came out to show off their wares. We had a mission - find heating grates to allow radiant heat to flow to the upstairs. I'd done a bit of research to establish price points and now we were on the hunt!

 Round Lake is full of gorgeous houses - some big, some small, all well decorated. We loved the tower on this one.

 Dad's shadow, me, Chris's shadow on the walk into town.

 They had lots of old linens. I love table cloths but didn't find any bargains this time.

Dad and me at a vendor with lots of kitchen stuff. Gorgeous cast iron pans! I've got a good selection already, so no money spent. Besides - the goal of the day was heating grates.

We found a set that had been painted white (ugh) and were marked way too high. But then, up ahead, what is that? Is it? Yes! Three grates leaning against a table. Note that there are no pictures of these as we were far too excited to remember to get out the camera. Two of the grates had a fleur de lis pattern and the other two had a geometric design. Of the geometrics, one was in good condition but the other was disassembled and had a few cracked pieces. But since I only need three grates, we were good to go. I'll be sure to post pictures of them soon.