Showing posts with label Weaving. Show all posts

Monday, April 22, 2019

Sleying and threading

I'm finally ready to put the warp on the loom. I decided to dress it front-to-back because 1) that's how we did it in class 2) that's how my 1949 instructions say to do it and 3) I didn't want to have to make any more equipment (to dress back-to-front it helps enormously to have a raddle). 

I brought my first chain of warp to the loom, wrapped it around the breast beam, inserted my fingers through the cross, and carefully cut away my end tie, counting ties, and choke. The warp was now released! And that's when I realized that I didn't have my sleying tool near to hand. Crap. 

It's critical not to let go of that cross section of threads. That's the only way you have of making sure you don't mess up the pattern. So I unwrapped it from the breast beam, captured the chain in my free hand, and retrieved the tool. Happily I made it back to the loom without dropping anything. Whew!

Carefully holding the cross in my left hand
Pulling a thread (or "end") through the reed
I made a good start, got that first section of warp done, and took a break.
Sleyed
Over the next several days I worked at the loom in small segments of time to sley the rest of the reed. I got progressively quicker and neater as I went along. Which is great because that first section was a mess. Can you see how twisted it looks?
Bright warp
Once the reed was sleyed it was time to thread the heddles. I've already mentioned that each shaft has a different color scheme for the heddles. This made it much easier to follow the pattern. I wrote it on a piece of paper with shaft number and associated color, then figured out how many heddles I needed on each shaft. Once I had that figured out, I started to thread.
Found a footstool just the right height
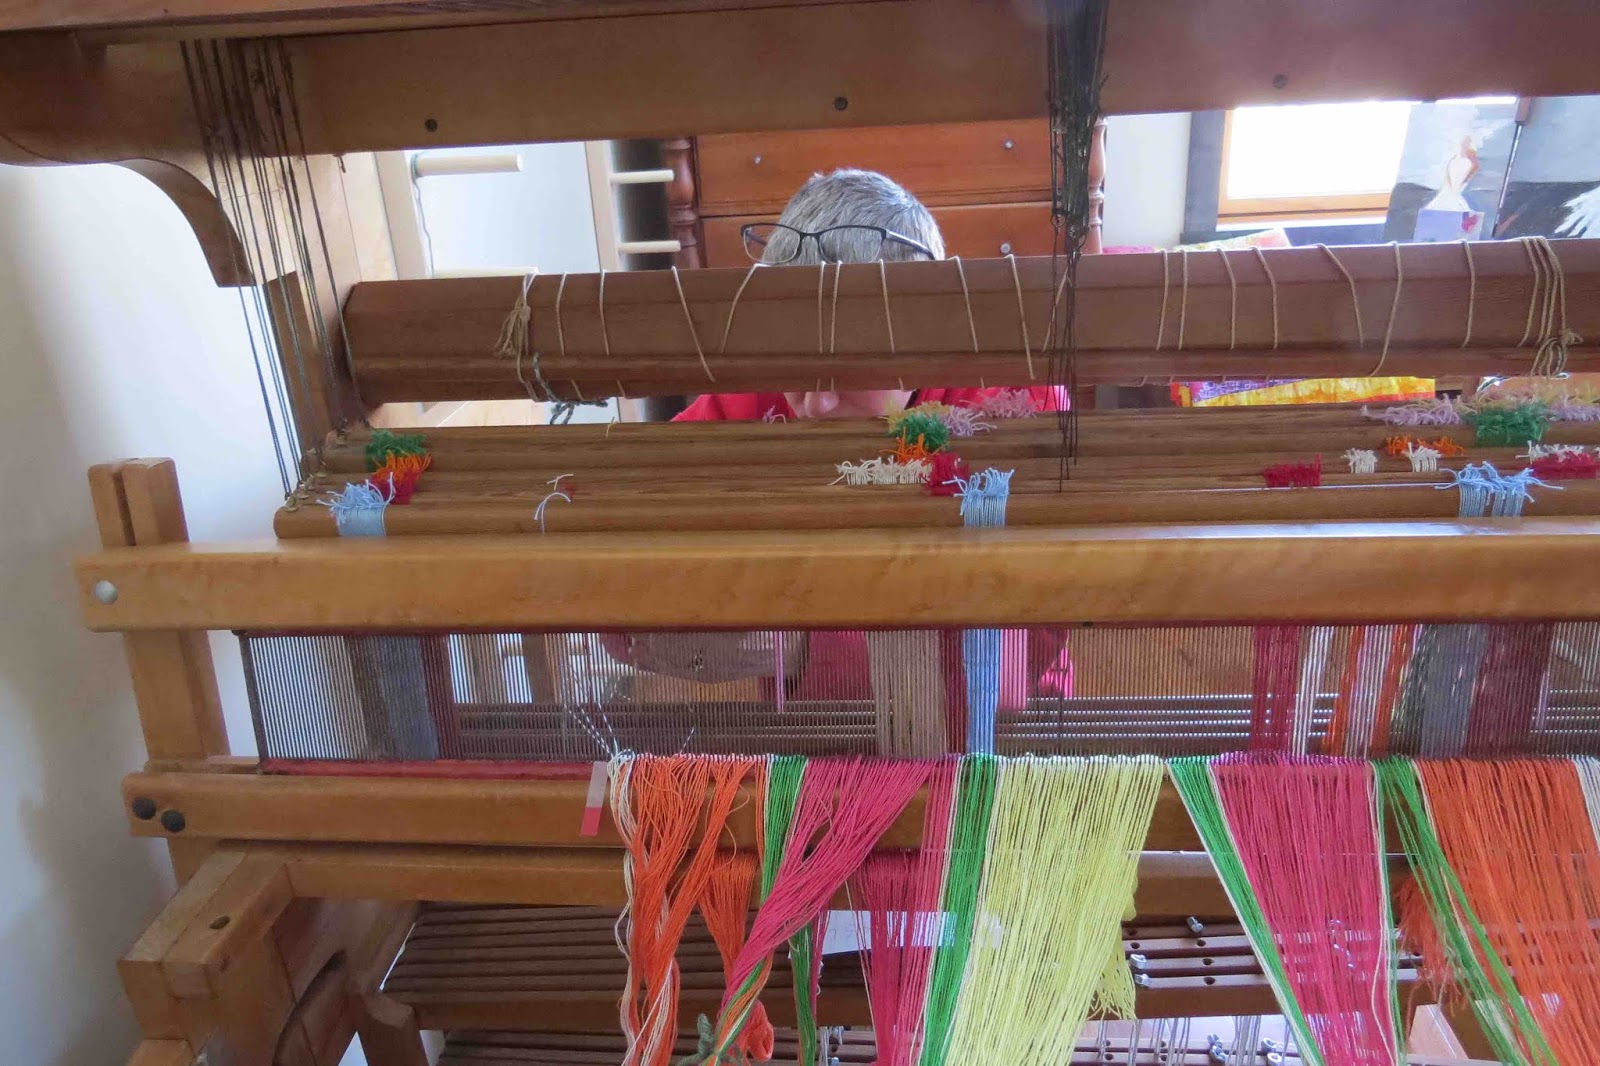
Hiding behind the loom (and that darn twisted warp)
After many days (with much time spent away from this task in an attempt to keep it from killing my back) I had it all threaded. Success!
Way more messy than it should be
Or so I thought. When I went to try to put it on a rod so I could wind it onto the back beam, I discovered the dreaded threading error. Right smack in the middle of the warp. Of course.
Cleaning up
So I went back and started cleaning up my mess. This is much closer to what it should have looked like all along. If I'd done a better job straightening the threads and tying the groups I probably would have found the error much sooner (or not made it at all). I also discovered that I prefer to thread from left to right - it's been much easier keeping things neat.

I tell myself that's how we learn - we screw up royally and have to fix it. And given the amount of time this has taken to correct, it's been a valuable lesson indeed.

Friday, April 19, 2019

Warping Board and bobbin winder

Once the loom was set up in the studio it was time to dress it. Hooray! Okay, how, precisely do you dress a loom? 

Well, first you have to wind a warp. Cool. How do you do that? 

Well, you can use all kinds of work-arounds (ladder back chairs, clamped broom handles?!?, the hands/arms of patient friends and family) or you can use a warping board. Awesome. Since I don't own ladder back chairs I figured we'd just build a warping board. Easy to find pictures and figure out what size would be good. Plus there was one at the shop where I took my weaving class and I had a photo of that to use too.

There were a lot of pegs to cut and holes to be drilled. Took a while as Chris used oak for the frame and that wood was hard! Had to keep stopping to let the drill bit cool down.
Drilling holes for the pegs
Once all the holes were drilled Chris assembled the frame and banged in the pegs. 
Cleverly protecting the wood floor
Then it was a simple matter to mount to the wall at a comfortable working height.
Screwing in the frame
I can wind 10 yards of warp on this baby. Woot!
I'll oil it this summer when ventilation is better
Videos on YouTube were my salvation here. So many people giving time and energy for us newbies! Seems like it'd be a simple matter to wind on string but there are crosses and counting ties and it's easy to get off track.
Waste yarn as a guide
Not sure if you can see the cross that keeps the warp threads separated but it's there at the top. Then you have ties to keep the warp neat when you cut it off the board, ties that count ends per inch (I was doing groups of 12), and ties that provide assistance when you actually get to put it on the loom. That's a lot of little pieces of yarn! I was nervous about how many strands would fit comfortably on the pegs and took off the first section way too soon. I got better though.
Taking off the first section of warp
Oh! Another thing you need when getting ready to weave is a bobbin of weft. So you need a bobbin winder. These things are ridiculously expensive so Chris offered to build me one. It wouldn't be powered (just hand cranked) but it would work well and it wouldn't cost me a small fortune. Then he had a thought, did some internet research, and saw some ideas on adapting a power drill.
Ta-dah! A powered bobbin winder that works great!
Amazing!
I've finished winding the warp and will now dress the loom. Wish me luck!

Wednesday, March 27, 2019

Setting up the new loom

Getting the loom home was only the first part of the battle. Then I had to figure out how to set it up. Let's keep in mind that I am totally new at this whole weaving gig and have never actually done any "behind the scenes" work on a loom. This was going to be both an education and an adventure.

The extremely nice woman, Rebecca, from whom I bought the loom had tied it up tight so that it wouldn't get damaged when transported. This had the added benefit of leaving as much of it actually set up as possible. I could get a good look at what went where. 
Ropes for security, Tex-solv for treadle tie-ups
The plastic tabs that keep the Tex-solv in place
The unfortunate downside to all this tying together was that the loom, with all its component parts, was heavy. Way too heavy for me to be able to assist Chris in getting it up the stairs to the studio on the second floor. So I took lots of photos and started disassembling. I ended up with a slew of written notes about what went where and how it was all connected before I had the loom down to a light carcass.

I'm pleased to say it worked (and I learned a LOT about how a loom goes together). It was now quite light and not cumbersome at all. Up the stairs it went! And it was incredibly easy to reassemble. It's logical: breast beam, warp beam, shafts, etc all went where you'd expect them to go. I only wish the tie-up had been as straight-forward.

I'm going to warn you now - this post gets a bit into the weeds on looms, drafts, and tie-ups. If you aren't interested in my rather round-about and mistake-prone journey, scan to the end.

So, the tie-up. Argh. I picked a weaving draft from Rebecca's book (yes! she's published! and she gave me a copy! And no, that's not an affiliate link; I just wanted to share) and started to figure out how to tie the treadles to the lamms. Rebecca used Tex-solv and pegs for her tie-ups but I had a heck of a time with them. The pegs didn't fit well and I couldn't get the button-holes in the Tex-solv to consistent lengths. My treadles were all over the place, some high, some low. Double argh.

Doesn't this look like fun?
The hated pegs
Cooper is bored. I'm frustrated.
After many hours I did finish the tie-up. But when I checked my shed (the space created by the shafts lifting and lowering and where you pass the shuttle through to create the weft), the shafts that were supposed to go up were going down. No! What'd I do??? Well, I used a weaving draft written for an American audience to do the tie-up on a Swedish loom. I didn't realize that drafts for jack looms are written differently than drafts for countermarch looms. Whereas jack loom drafts only need to mark the treadle/shaft combination that moves, I need to tie up all the spaces, both marked and empty (hit and miss). Argh again.

I really didn't want to deal with all the Tex-solv issues again so I decided to do some internet research on Bergman Loom tie-ups. I also got out the paperwork that came with the loom and read it more carefully. This loom was built in 1949 and I have a copy of the original directions. How's that for awesome archiving? I'm the 4th owner of this baby and the folks who came before me did a great job keeping the info together.

In reading through the instructions (such as they were - it's obvious that they assumed you weren't exactly a beginner if you were spending money on a loom back then) I found they used cord (similar to waxed shoe laces) and something called a "snitch knot" to do the tie-ups. Back to the internet I went and found out how to tie a snitch knot and that Glimakra still recommends that method for tie-ups on their countermarch looms. They even have very clear instructions on how to use it. Cool.
Taking it all back apart
I also found that some people use glass beads to anchor the cord on top of the lamms so that the cord goes through evenly rather than wrapping weirdly over one side. I didn't have pretty glass beads but I did have nuts. Score for the hardware win!
Improvisation at its best
The tie-up went much more quickly this time and the correct shafts went up and down.

Upper and lower lamms tied up
Close up of the snitch knots
Okay, so I am now tied up and ready to weave, right? Wrong. Rebecca's book is actually about stash busting but I'm new so I had no stash to raid for the warp. I figured this was an excellent opportunity to start building one so I placed an order for 8/2 cotton in bright colors.

Next up - creating a warping board and improvising a bobbin winder!

Monday, March 11, 2019

I bought a loom!

After my weaving class in January I started looking at various online sites for a loom to purchase. I wanted an 8-shaft floor loom. Preferred a Macomber simply because that's what I'd used in class and I had a sense of familiarity with it. 

It quickly became clear that although there were many, many 4-shaft looms out there on the used market, 8-shaft looms were more rare and much more expensive. I was searching multiple sites, multiple states, and willing to travel. Ultimately I found a woman selling a Bergman countermarch on Facebook Marketplace and we started a conversation on how to get this rather large and cumbersome piece of equipment/furniture from her home in southern Virginia to my place in northern New York. 

Fortunately, we discovered that her son lives in DC and so does our niece. She was willing to meet us! How cool is that??? We loaded up the dog and headed off on adventure.

Half an hour on the road and there was a weird noise under the truck. We pulled into a parking lot and Chris made like super-mechanic and got us going again.

This is not a good sign...
We made good time to DC and had a nice visit with Rachel and Bob (and Huck!).
They remembered each other
After a bit of back and forth as to the best place in downtown DC to make the exchange we ended up in front of the Federal Reserve Building. The reasoning? It's Saturday and would be quiet this time of week. The reality? Only one parking space available on the street. So we blocked the driveway into the Fed. Sure, makes sense to me.

Note the many signs warning not to stand or park...
It was freezing cold and windy but everyone was very good natured. Fortunately that included the DC patrolmen who stopped by to see what we were up to. And do you know - they asked if they could help lift the loom into the truck because it looked heavy? Incredibly friendly. Fortunately we didn't have to take them up on the offer.

I got a mini-demo of how the loom was tied up for transport then Bob and Chris put it up in the truck.

Explaining how it's tied together
They managed just fine
We wrapped it up well and made it home without any incidents.  Then it was time to get it set up!
Long drive home

Monday, February 25, 2019

Learning to Weave

I took a 2-day weaving class a few weeks ago and loved it. Absolutely adored the whole process. The class was taught at a local place called The Textile Studio owned by a lovely couple who have been weaving together for years. It's both a production studio and a store where they sell clothing made from their own cloth. So cool.

Three of the floor looms were already warped when we arrived so that we could get busy creating but they'd left one loom empty so that we could see how to tie up a warp. Oh my. It's not hard exactly, but it does require attention to detail and time. That's obviously a skill set that will have to be developed.
Table runner warp with example weft in Natural
I thought a darker color would make the warp colors pop more so tried black. It worked!
Changing the weft to Black
We were shown how to change warp colors mid-stream too. Not for the faint of heart!
Changing warp colors
There were three of us in the class and with Cecelia and Richard on their looms we had five going at once. They're surprisingly quiet and we really enjoyed the whoosh and clack of the looms as we went along.
A productive studio
I managed to turn out three pieces and I'm inordinately pleased with them. I've worn the scarves multiple times already and the table runner is happily sitting on the table right now.

Steadily weaving - for five hours...
In process - my new scarf
And here are the three pieces I finished:
Chenille in gorgeous olives and oranges
Wrong & Right sides of the table runner
Pinwheel in purple, green, and natural
Of course the downside to all this is that I'm now in the market for a floor loom. I've got searches out up and down the east coast and if it wasn't winter I'm pretty sure I'd have headed to Maine once already. So far I haven't found the magic combination of price, location, and loom type. It'll happen though. Wish me luck!