Showing posts with label The build. Show all posts

Friday, March 23, 2018

US Bathroom update - sink cabinet

Deconstruction of the sideboard progressed quickly (despite the delay in posting about it) though there were an awful lot of swear words involved in taking this thing apart. Chris said it was like someone's extremely skilled Grandfather cut all the pieces and began assembly, passed away, and the Great-Grandkid, who once read a book on furniture construction, decided to put it all together. With as many nails as humanly possible. But Chris got it apart with minimal damage and did the work necessary to put it back together. 
Perfectly fit sink water pipe
Next up was cutting the hole for the sink. Why don't sinks come with full size templates? They very kindly included a page with the hole template but since they didn't bother to depict the entire sink area we had fiddle around to figure out the reveal. I finally just drew the outer dimensions on the same page and cut that out first. Placed it with the desired amount of cabinet showing all around, tacked the corners, and drew in the sink cutout. Then I left while Chris cut through the antique top with the unmatchable layered paint. I just couldn't watch.
Of course he did it perfect. 
The nails in this old cabinet had gone through a lot of weathering. I'm quite sure it got stored in a barn or two along the way. Which means the wood got wet, got dry, swelled and shrank, and had a very tight grip on those rusted bits of metal. So removing them resulted in some tear-outs and many holes (note they had to be removed to retro fit this for the sink and plumbing and whatnot. Plus they were ugly). I decided to try to touch up the bare wood since they were small spots but glaringly obvious against the green/black patina.
Holes and tear-outs left bare wood
Acrylic craft paint in flat green and satin black, dabbed onto the brush as I painted, worked surprisingly well.
Imperfect mixing was the key
Chris got it plumbed and then went to work on figuring out the drawer configuration.
No drips!
The drawers were cool. Dowel joints and grooved bottoms (that Grandpa knew his stuff) were strong and Chris wanted to preserve them despite the fact that we needed to significantly alter the depth of the drawer in order to accommodate the plumbing. To keep the dowel joints front and back but still remove a good 12 inches from the drawer depth he had to take the drawer apart, cut out the center section of the side, rejoin the cut pieces and keep that groove perfectly straight. I just wish we had a picture of that join! This is the best I could do - see a join? Nope, me neither (Chris knows his stuff too).
Fitting it all back together
Curved the back to fit the sink bowl
Just deep enough to be useful
The rest of the cabinet is done and we're using the space (hooray!) while we figure out how to best use that itty-bitty closet area. More pics soon!

Saturday, February 10, 2018

Making progress on the upstairs bathroom

Shortly after posting about planning the upstairs bathroom we actually got started working on it. Using blue tape we laid out walls, shower pan, and even a tile rug. We were ready!
Taped out walls for storage area and towel hooks over vent
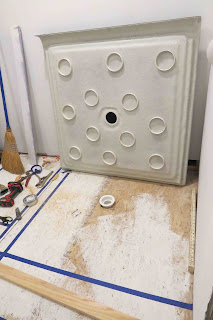
Making sure the drain was in the right spot
Given that we'd plumbed this spot 5 years ago, I think we did pretty darn good placing the drain.
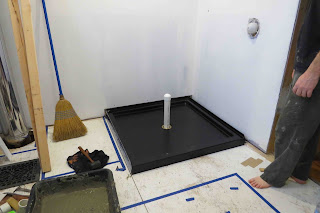
Okay, whew!
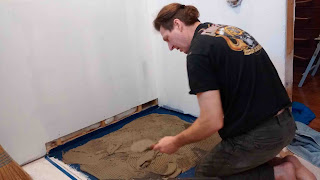
First up was setting the shower pan in a mortar bed. The floor was level so it was just a matter of gooping down the mortar and firmly placing the pan in it.
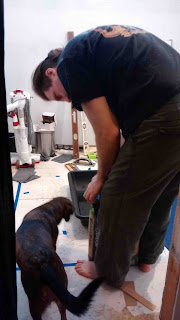
Cooper is always a help
Yup, still helping 
Goop, goop
Apparently I didn't take any pictures of setting the pan in place. Probably because I was helping to place it instead of snapping pics. And then Chris got busy building the walls to enclose the triple-wall stove pipe, the towel area, and the storage closet.

Walls!
In the process we realized that the storage closet was now more of a nook. A niche. A wee small space that wasn't going fit much. Shoot. The hook area to the right was awesome though - right over the heat vent. Nice!
Wait - how wide is it now?
So we're going to get creative with the storage nook. Most likely it'll be a deep cupboard on the bottom and open storage shelves above. I'm sure we'll come up with something handy. Chris is thinking about one of those pull out storage units that would make great use of how deep the area is (it's 30 inches deep but only 17 inches wide). That process is on the back burner until the room is tiled though.

After drywalling and mudding, we painted. That went wicked fast in a room this small. Then we set up Dad's tile saw, prepped our stuff, and started tiling the shower stall.
Painted, prepped, and ready to tile
 That took a few days but came out great.
Ta-dah!
Grouting took a bit of elbow grease (and some roughed up fingers). We used a charcoal gray grout to emphasize the grout lines. We'd done this in our previous house and loved the look.
Wiping this off took forever
The it was time to start the floor tile. First we laid down a layer of Ditra.
That was quick!
Then we dry-laid the penny tile sheets we'd bought. I wanted a rug design in the sea of white tiles so we bought one sheet of black penny tile and then laid out a pattern I liked. We used blue tape and a dry-erase marker to lay out the design and mark the tiles.
Dry laid to test the pattern
Then we numbered tile sheets so we could place them back in the boxes, ready to be used the next day. If you're contemplating doing something like this I strongly recommend a good night's sleep in between the design and implementation stages. Let it sink in a bit - we ended up changing how we laid out the tiles when we realized that we were going to be fighting placement lines.
Laid out and numbered
To solve that we dry-laid again, and moved the tape & marks to accommodate a staggered sheet placement. Then the tiles were again picked up and put in boxes. When we started tiling it was easy to pull out the tile I needed, pluck out the white tiles where marked, and replace them with black tiles to create rug. No thinking about pattern so I could instead concentrate on getting the sheet in the right place.
This went surprisingly fast
We only laid one section and we'll let it set before doing the edges of the room. Why didn't we start in the far corner and work our way out? Because the rug needed to be positioned properly against the shower edge and door. Since that was our most critical area, it got done first. It won't be a big deal to finish off the other sections next.
Coming right along
After the tile sets we'll grout (again with charcoal gray). Still tons to do after that - trim, pocket door, sink cabinet, fixtures, storage, etc, etc, etc. 

Wednesday, July 5, 2017

The east end of the house - Stone Patio and Fire Pit

Way back when we excavated to build the house we ended up with lots of rocks. And since we live in the Adirondacks, when I say rocks, I mean ROCKS!

Lots of big rocks
A lot of them were large and quite a few of them were simply huge. One in particular caught my eye and I convinced our excavator I was not insane for wanting him to carefully place it next to the house foundation. 
The future buffet rock
We worked around that sassafrassing rock all during the build.
No food on it yet
But I had a vision. A clear picture of how I wanted the east end of the house to look and function. And that rock was a big part of it. The east end would serve as our outdoor entertaining area. A natural stone patio, a sand pit with fire ring, comfortable chairs, a pizza oven, and by God, a buffet rock. 

Way back in 2015 we actually got a good start on the stone patio. We even ran a water line to the garden under it.

Then I hurt my shoulder and we took a year off for it to fully heal (yes, it took that long). Then we decided other projects and adventures had priority and we put it off for another year. Finally, we got back to it and got it done! Chris deserves all the credit for the rock laying since he forbade me from helping this time (apparently that shoulder injury bothered both of us). 

Connecting the house to the buffet rock
Then buffet rock to sand pit
The rocks he brought in to create the sand pit were huge. Some are tall enough to serve as seats, others create a smooth transition from the patio.
Sand pit ring taking shape
 The sand pit is about 20 feet in diameter and took close to 7 tons of sand to fill.
Huge sand pit - tractor (and shovel) for scale
You come off the porch onto the stone patio that reaches back 40 feet to the rear of the house. Then it's 18 feet to the sand pit. We seriously depleted the defensive perimeter to lay this thing!
We'll plant grass outside the stones
I dug up some ground cover growing elsewhere on the property and started seeding it between the stones. I have no idea what this stuff is, but it's already starting to spread.
Eventually it'll be an ocean of green with islands of stone
Once we had the sand pit done we needed to create the fire ring. I found the center, did a bit of digging, some stone laying of my own, and then got the ring in place.
Digging the fire hole

Laying the air intake pipe
Stones around to help with erosion
Stones protecting the air intake pipe 
The view from the porch
I put a few chairs around the fire pit, got a good fire going, and enjoyed the evening. It's all coming along quite nicely.
Ahhh...


SaveSave

Thursday, March 12, 2015

A philosophical view toward kitchen design

I am an accountant. Not only by training, but by inclination. There was no question what profession I would pursue and I started training way back my freshman year of high school. By this I mean I am precise; I enjoy detail, clear instructions, and rules rather than guidelines. The odds are that if something needs to be done, then there is a right way to do it.

But...

As I progressed through my career I found that even in accounting there are "grey areas" (we've all heard about those, right?). Those areas are particularly prevalent in financial analysis where you take assumptions and history and try to figure out the best answer to what will happen if you do X. You learn to work with ambiguity and accept that your assumptions may be flat out wrong (hopefully not, but many people help develop those assumptions, so it's often more of a crapshoot than anyone wants to admit). You find that you have to adapt to new data, to stay flexible.

I turned to the kitchen to help restore my faith in "exact". Baking in particular is more science than art. Understanding the ratio of wet ingredients to dry, using weights instead of volume measures, following the rules, will yield consistently yummy results. I'm a very good baker. Cooking is more flexible and I was never an intuitive cook. That's why I enjoy Cook's Illustrated magazine - they are the ultimate do-it-this-way and it-will-turn-out-that-way resource.

But again...

I now spend significantly more time in my kitchen and I have expanded my repertoire of dishes. I stepped away from cookies and cakes where ratios really matter, and entered the world of bread where you have to adjust according to the feel of the dough. And I have begun to apply that instinct to my cooking as well. I still use recipes but I'm learning to treat them as starting points and I'm starting to trust my knowledge of flavors, textures, and the way ingredients work together.

So, what does this have to do with kitchen design? Well, I've been thinking about all this because I'm finalizing the kitchen layout. I've worked in this space for over a year and I think I have a much better feel for what I want and need. I've moved things around, used temporary storage racks, and tweaked to get what works for me. Most of the work left to be done centers around the cabinetry so there will definitely be some precise calculations, but I'll remember to stay flexible. To appreciate the art and purpose behind the numbers. And to let instinct guide the process.

Saturday, January 17, 2015

Adding a raised bed to my room

Storage space is always at a premium in any room but it seems like it's particularly important in a space that serves multiple functions. As mentioned previously, my room wears many hats - craft space, sewing room, office, and pantry. 

It also has a twin bed for naps, reading cookbooks, or guests - whichever comes up at the moment. Unfortunately beds take up a lot of space and don't tend to offer multi-use functionality. Unless you lift them off the floor. Then a whole new world opens up.

I didn't want a dorm-style loft bed as that would just be too high for me to use easily. But something up high enough to store boxes underneath? Yes please!

Painting the sides

Mounting the support rails

The file cabinet set the height as it supports one corner

Four sides mounted

Everyone uses walnut as their bed slats, right?

Checking it out 
Decorated!
It took Chris several days to plane the boards smooth (we used some of our rough cut pine) and then I painted them. Everything else happened wicked quick and it's now functional. I have wooden moving dollies that the boxes sit on and I can slide them in and out as needed. Boring, seldom used stuff like tax and investment files are at the back; craft supplies and my fabric stash are easily grabbed at the front. I'm still figuring out the best way to get into the bed - I'm using a step ladder at the moment - but we're thinking some cool sliding bookshelf steps next to the armoire would be awesome. And I want to paint the filing cabinet something cute and fun; maybe a town house kind of thing. In the meantime, this setup works great and I love being able to use the space underneath.

Friday, January 2, 2015

2015 Goal List - because I just can't resist

I know I said we'd only do the first quarter, but let's see what's ahead of us in 2015.
  1. The Pantry - otherwise known as "my room". Lots to do in there and fortunately we've already gotten started: clean out room, build loft bed, stain window trim, trim windows and walls, build and install cookbook shelf, refinish armoire, paint dresser, cut in wall paint, put door on freezer closet, finish door trim (2 openings), build desk, paint file cabinets, build work island. Painting of furniture is actually more a "craft" than a "to-do" since it's optional and fun.
  2. Install a tin roof on the equipment area
  3. Trim out the interior of the house (not sure if we'll do the entire house at once or go room to room). That darn wood has to be dry at some point.
  4. Replace construction stairs with permanent treads and landing
  5. Replace construction railings with permanent ones.
  6. Build Chris's workshop!
  7. Build storage on the front porch
  8. Get the Bridge done? Maybe.
  9. Work on installing the garden beds and east-end stone patio
  10. Install permanent kitchen sink
  11. Upstairs closet doors - build and install
  12. Pretty up the porch - rebuild the pallet day bed, put some pillows and cushions out there, and generally make it more pleasing to the eye.
Nice-to-do includes: finishing the mudroom (making it pretty as well as functional), cosmetic fixes (ceiling heat grates, repair ceiling where scraped, hanging art, etc), work on the trail system, design the kitchen cabinetry, and reorganize the garage if the shop gets built. Of course the year will be full of the usual things as well - road and yard maintenance, cutting and splitting firewood, equipment maintenance, agility training, travel and visiting with friends/family, and all the other stuff that fills our days. Wouldn't have it any other way.

Thursday, January 1, 2015

Happy New Year!

Happy New Year! May fortune smile upon your household in the year to come.

December 2011

December 2012

December 2013

December 2014