Monday, June 24, 2013

Road maintenance

We have a long driveway. A very, very long driveway. And it feeds off a private road. A very, very long private road. Great for privacy; horrible for road maintenance. Add to this the fact that the driveway started life as a skidder trail (those honking big machines used to drag timber out of the forest during logging) and you can see that we have work ahead of us for years to come.

When we bought the property oh those many years ago we spent time and money improving the road. It worked and we've been able to drive in pretty consistently (the first year the road was so bad we had to bring materials onto the site with a wheelbarrow to get through the mud). Then while we were building last fall we hit some freeze/thaw cycles right when big, heavy trucks needed to come through. They toasted the road.

Just some of the damage
We couldn't fix it right away because we had to get through spring thaw (mud season) and wait for the weight restriction to be lifted from the main roads (limited to 4 tons during aforementioned mud season).

First we put in a new culvert at the main road. Actually, this time we paid for it to be done. Since we needed the excavator and dump trucks anyway, it made sense to have them do the work. 


Goes pretty quick when the equipment is this big. When Chris and I did the driveway culvert back in 2008, it took us all day and we got completely coated in mud (think face-plant comedy routine). Took these guys about an hour. And they were able to correct the grading at the entrance. Looks much better now.
New culvert at road
New grading
Then they started work on the road. They had to smooth it, dig drainage ditches next to it to eliminate sponging, and dig up and replace an old culvert that wasn't quite doing its job.
Repairing the old culvert
Then we had them bring in rocky fill so that we could begin laying a road base up by the house. The main driveway just needed smoothing and fines, so that went pretty quickly and we've done most of the smoothing work there ourselves. We've also started culling rocks from up by the house and moving them to the culvert entrance/exits and the ditches. That should help keep the proper shapes.

The house driveway was in bad shape (Remember when the Nat Grid truck got stuck?) so we needed to completely rebuild that road bed. Step one is some basic grading, which we did with our tractor.
Step two is to bring in some surprisingly rocky fill.
Big rocks!
This looked so wrong when he dumped it out. But those big rocks push to the edges of the road and help keep the dirt in place. If you just have sand or fines it washes away in the first big rain.

So we used the tractor again and slowly spread out the fill. Once it's in place it looks more reasonable but I still wouldn't want to drive a car over it. 
All spread out
We've got two more loads coming of decreasing rock mix. Fines on top will smooth it out and it should hold. Keep your fingers crossed for us!


Sunday, June 23, 2013

Pantry lights

Last summer I was trolling the internet and found a ceiling light at IKEA that I just loved. Loved enough that I altered the lighting plan for the pantry by taking out the center ceiling fixture and changing the layout to accommodate two pendant type lights instead. In my imagination, they looked great and would provide nice ambient illumination for that room. As a reminder, the pantry is 12 x 14 and will act as storage, office, and craft/sewing room. Lot going on that room.

Roll forward six months and it's time to actually make an IKEA run (it's 2.5 hours away so you tend to plan a whole trip for it) and buy my lights! Except when we get down there, I hate them. They are too big. Too clumsy. Too darn wrong. Argh.

Now what?

Fortunately IKEA has a pretty darn good lighting selection and I found these that I liked just as much as the ones in my imagination.
Isn't that sweet?
Chris did the actual installation and they went up fairly quickly. Not a huge fan of IKEA instruction sheets - sometimes they assume a bit too much - but the lights went up just fine. (Still have a hot mess in the pantry with all the packing boxes).

Fine tuning the install
The only issue we had was with the drywall cutout for the fixture. It was a wee bit too wide and showed a gap on the second light.

Can you see the drywall gap on the far light?
So we had to take down the light, patch the drywall, touchup the paint, and then reinstall the light. DIY never goes quite as quickly as you think it will.

Now the lights are up and I can unpack at night! Hmmm, not sure that's really an improvement.

Saturday, June 22, 2013

Finished downstairs bathroom

Admittedly, I'm biased, but the bathroom came out great. Great! We can now forget all the effort that went into applying and cleaning up 136 square feet of charcoal grout and just appreciate the results.

An unbelievable mess
Once the tile was done, I realized that painting the walls above the tile would be potentially messy as all get out. So I taped up a bunch of plastic (this is where Chris vacated the room - he has no patience for this stuff) and started painting. I used some leftover white paint and added a bit of the charcoal that went on the main walls to get a soft grey. 

Too soft. Darkened it up and applied another coat. Nope, still too light. Gave another go and now have a nice grey (although slightly on the blue end of the color spectrum) above the tile.

Third times the charm
It was also finally warm enough to spray paint the assembled sink base. Here it is in all its skeletal beauty.
Sink base looking weird

Finished tile
We added some nice towel hooks that I got from Lowe's. The shower is long enough that the towels can hang inside without getting wet. Which means you can dry off without opening the curtain and therefor get to keep all that wonderful heat inside with you.
More finished tile
Then we needed to hang the shampoo/soap bar. Picked up a set from IKEA and we used the infamous blue tape method to get a level mark.

Blue tape is level, just pick your spot to drill.
Drilling through tile sucks. Nerve-wracking because you don't want to crack the tile and hard because, hey, it's tile. After this Chris swore he was going to buy some good tile bits. I held him to it and went directly to Home Depot. When we get to the upstairs bathroom, we'll be ready!
Drilling...
But the finished bar looks nice. 
Just add soap
We hung an antique mirror opposite the shower (those are the two shower windows you see reflected).
Bad reflections
 And went with a framed chalkboard for over the sink. Kitchy? Yup. So worth it. The sink base isn't quite done. The two shelves left & right will be finished and raised up nearly level with the sink. But we're waiting on a couple of nicer slabs from some of the trees on the property (they have to dry before we use them). For now a couple of cutoffs from the scrap pile are working fine.

Partially completed sink
We also don't have a door. Or trim. But those are coming soon. We do have pretty hooks and I found a neat place to put some of the art we've collected over the years.

Hmmm, need that door...

Friday, June 21, 2013

And we're back!

We've been MIA for a little while and although I swore I wouldn't apologize every time I disappear for a bit, I do think an explanation is warranted this time.

This is why I've been remiss in my blogging:

The culprit
We began trying to get satellite internet in early April. The less-than-competent installer who came out used his broken compass to approximate the satellite location and identified the many trees that needed to be cut in order to get a view of the southern sky.

Now, we knew we'd have to cut trees. We purposely selected an antennae site that would track over the  future garden so that the trees would not come down in vain. 

This is the future site after much clearing though with much more clearing needed. In process so to speak. Note Chris there to the right - those are very tall trees.

Still more trees need to come down
We took down the indicated trees and asked the installer to come out again to do a final check as we didn't want to take down more than required. He finally showed up and indicated that we cut the wrong trees (?!?) and we needed to go much further to the right. Huh?

Time is passing because we have to call LA in order to schedule each visit - and sometimes he just doesn't show. Can you tell I'm annoyed by all this?

Getting there...
We clear a bunch more trees. And call again. And thanks be, we get a different installer. Who uses his handy-dandy iPhone ap to find the satellite and says "you didn't have to go all the way over there - the link is just past that group of trees on the left." The left!!!

15 years of clear sight to satellite
So, despite a bit of bitterness (ahem), we now have internet and I can begin to post in the lighthearted and slightly informative manner that you've all come to expect. Rant over.

Sunday, April 14, 2013

And what have you accomplished lately?

We're at the stage in several projects where it feels like not much is getting done. The downstairs bathroom is still the priority but each step seems to require down time: lay tile - let it cure; grout - let it dry; seal the grout - let it cure.

To keep on track and not flail around like we're growing in DIY, we created an "April" list. Whenever we have a bit of downtime, we check the list and make sure we're working on one of those things, not something random.

Some things on the list are big: downstairs bathroom; build upstairs storage area. Some are small: hang candelabra over dining table; hang pantry lights; etc. It's working for us (except mud season forced us to add "repair road" to the list).

So the last couple days while the sealant was curing we've:
1. Taped the sink base so that I could spray paint the pipe (have to wait for the weather to get over 50. Heck, at this point I'm hoping it gets over 40 soon).
2. Hung the pantry lights
3. Repaired drywall around switch covers and pipes
4. Unpacked more of the pantry stuff
5. Installed a twin bed in the pantry (that'll make more sense later, trust me)
6. Moved a storage cabinet out of the Nest and into the kitchen
7. Worked on repairing the water-logged road
8. Read a couple books (gotta take some downtime too, ya know)
9. Applied a finish coat of paint to the bathroom walls

Tonight I'm making spaghetti sauce, opening a bottle of red wine, and enjoying the fact that it's finally stopped raining/snowing.

Saturday, April 6, 2013

Stairs, lights, and rugs - oh my!

While I was out of town on a shopping trip with my sister, Chris got stairs up! They’ve got the construction treads on them still as we don’t have the wood cut for the finished treads, but oh! How awesome to be able to carry boxes up and down stairs instead of a ladder. It’s the little things in life, ya know?


One stringer up and starting the landing

And we have stairs!

Future closet under stairs
The cat loves them by the way. She’s going to be very disappointed when we put the back on them. We won’t leave them open simply because we need the storage space and that’s a very deep closet-to-be. Too bad, as I kind of like the look. But when you build on a slab and give up all that awesome basement storage, you quickly realize that inside storage is at a premium.


Cat staring through stairs - her new favorite activity
Some other stuff that we’ve been up to:

Put shelves in the freezer storage closet off the pantry. So I’m making great progress in unpacking all my cooking gear.


Shelves to left go all the way to floor
Set up a new chrome shelving unit in the kitchen that’s much prettier than the plastic one we had there. Plus it’s bigger – useful and good looking! The other storage units are being set up in the future upstairs bathroom which is going to be a temporary storage space.

Easy assembly

All filled up
Put up a new kitchen light in the middle of the room. Went down to IKEA to buy some functional/pretty stuff like living room rugs and the aforementioned light. Okay, I managed to buy some other stuff too, but since they’re not installed yet, you’ll just have to wait for another post.


A very subtle new light

Not so subtle rugs
 And here's a sneak peak at our bathroom sink design:

Sink parts
 Makes a lot more sense when it's assembled...

Rough assembly
We dry-fitted it to make sure we liked it and to make sure we had all the pieces we needed. Turns out we needed some unions that would allow the last pipes fit together properly. So the test run was a success in that it pointed out we needed to do a bit more work. The sink is white porcelain and will sit in the center; on either side will be a slab of wood that we finish with a marine varnish for durability. I think it's going to look awesome.


We’re also doing road maintenance. Mud season is upon us and we’ve sustained quite a bit of damage from truck traffic. So the road needs to be smoothed and new fill brought in. We’re also going to put down some landscaping fabric (or something similar) to help create a water barrier.


They're even worse than they look here
 So that’s latest. Spring is finally coming and all the outdoor tasks start as well. Looking forward to doing some light gardening and building a stone patio.


Friday, April 5, 2013

Time to tile

The first room that we want to have fully finished is the downstairs bath. We’ve been working on all kinds of temporary rooms – more for function than form if you know what I mean. And we’ve been doing really well with that, but at some point you have to actually start finishing rooms and we figured this would be the best place to start.


We poured the shower pan and let it cure. Then we started laying the mosaic stone tiles for the floor.  That went quickly and we were done with that step in a few hours. The floor tile went down much easier than we feared although it was a bit of a pain to cut the slate simply because the tiles were so small. We used nippers and a tile scorer to do the cuts at first but ultimately found that the tile saw worked best. Just had to be really careful with those itty-bitty tiles.


Love the stone!

Once the floor was down we needed to let it set for 24 hours before walking on it and took the opportunity to visit with friends up at their sugar bush. Maple syrup is awesome and if you knew how much work went into making it you would realize that the price on the bottle is cheap! Wow, what a lot of effort. While there we got a photo of this little guy. A young weasel grabbing a fresh caught meal. Couldn’t believe the luck in capturing this picture!


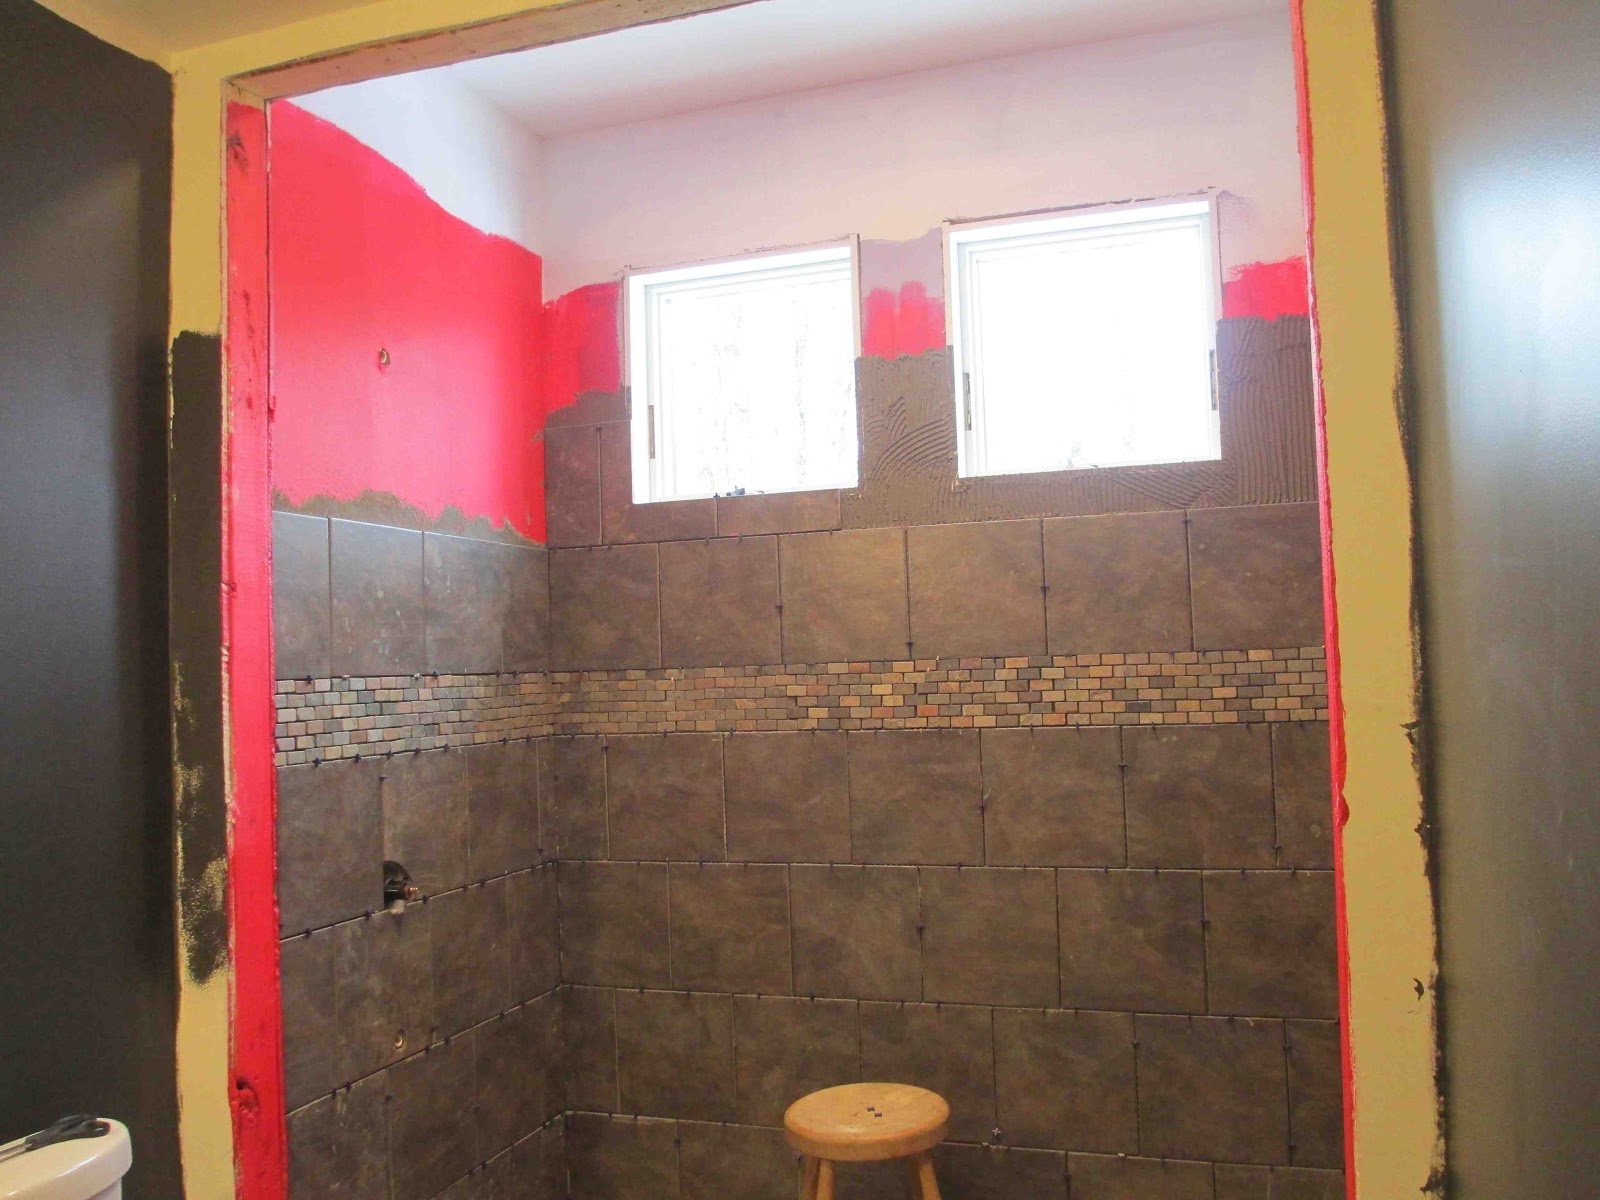
When we got back we tackled the wall tiles. Took a bit of planning as the floor was uneven due to the varying thickness of the stone. We finally got the first course laid and then it went very quickly. Working with 12-inch squares is really nice (our last tile job was subway tiles and those take forever to lay out). We had planned what the shower would look like: floor, tiles, mosaic border, tiles up to ceiling. But as we worked our way up, we realized that we had some different ideas that might look better than the original plan. This is what’s nice about DIY –you can change your mind mid-stream. Of course that’s also what’s horrible about DIY…


Working up the wall

The large tiles are porcelain while the floor is real stone

May have to keep the stool in there...

Painters tape provided make-shift support

Finished edge inside shower stall

Still like the stool
Anyway, we made some design decisions on the fly and we’re very pleased with the end result. The tile is laid and setting. We’ll tackle grout next and then the finish work around the windows and walls. It’s coming together really well and we’re far enough along now that we can make additional decorating choices about other parts of the room. Cool!