Bunty is our largest chicken. She was supposed to be a Black Sex-Linked but I think she got put in the wrong trough at Tractor Supply. She's large, assertive, and top of the pecking order.
 |
| The first out to explore the new coop |
 |
| Bunty on the left |
 |
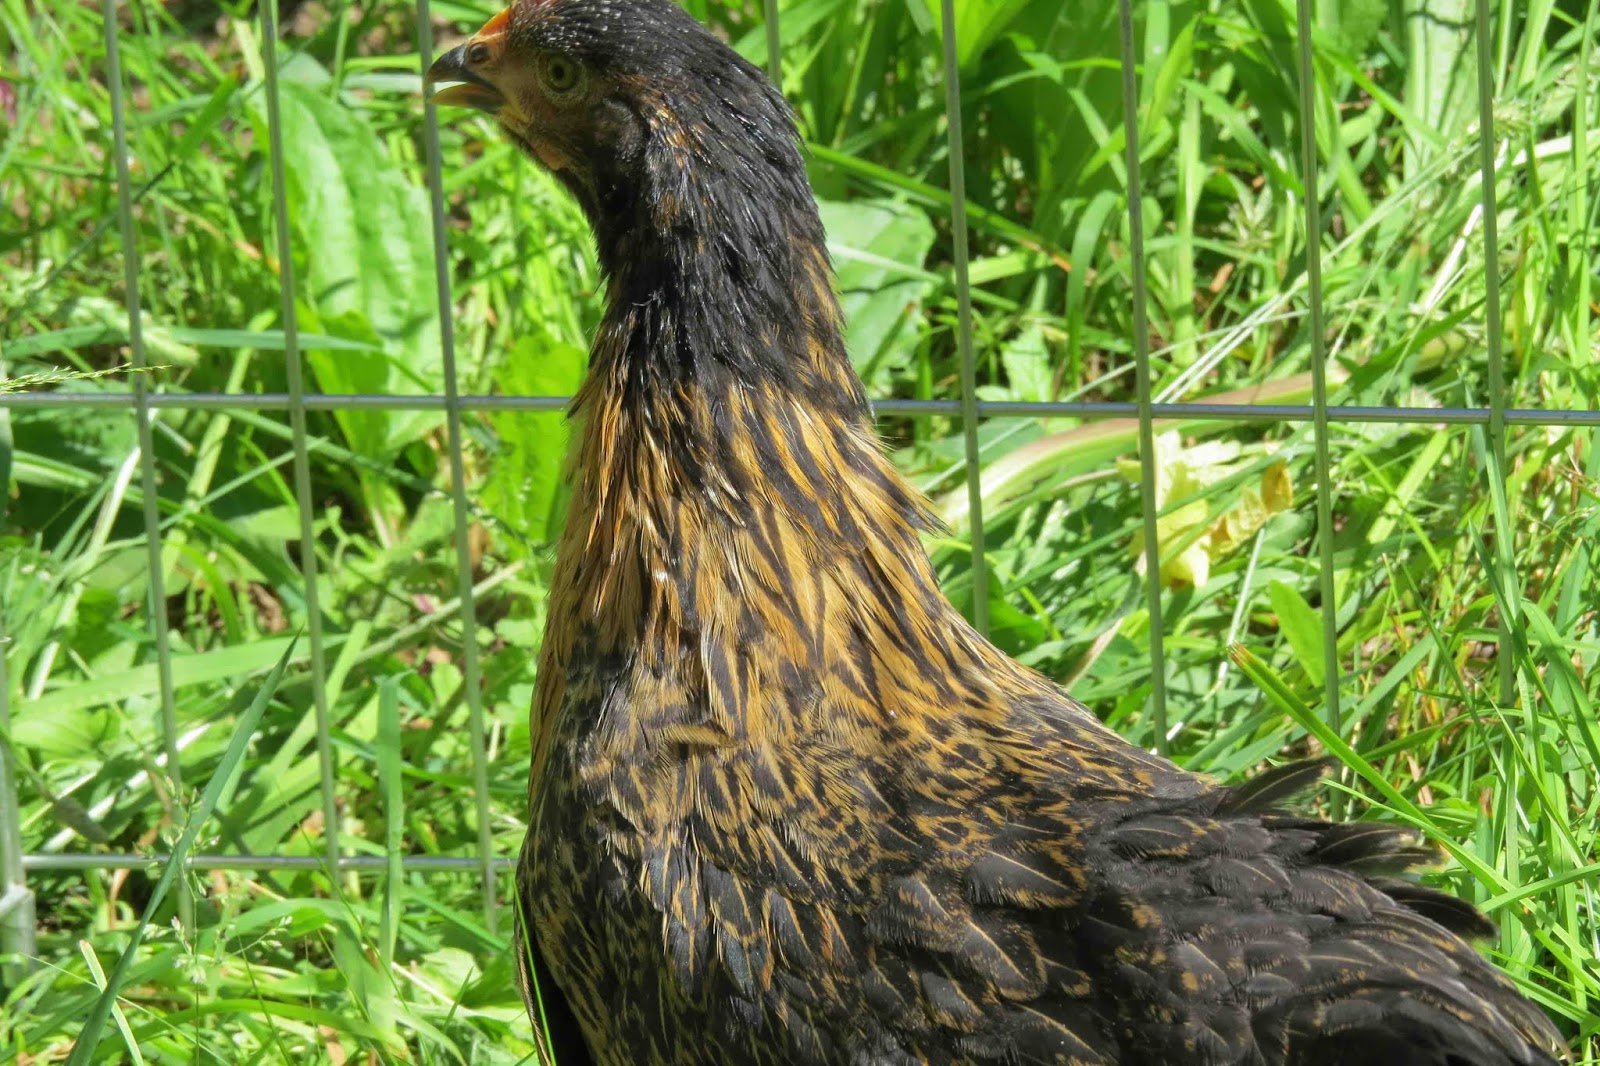
| Gorgeous coloring |
 |
| Looks more like a pheasant, doesn't she? |
In addition to a great personality she's a wonderful layer. Her eggs are dark brown and extra-large so they're very easy to identify. She was the second bird to start laying and she laid virtually every day thereafter. This winter when we were only getting one or two eggs per day, one was typically hers.
This is a rather long lead-up to why we think she has 9 lives - like a cat.
On Christmas morning I found blood drops in the coop. None of the birds were behaving strangely so I started trying to get a good look at them.
Were there bloody footprints in the snow? No. A torn and bloody comb? No. Everyone looked fine.
Then I saw this:
 |
| Look at her beak. |
If you enlarge the photo (it's kinda icky - actually, there are rather gross photos coming up so you may want to stop now if you get grossed out by this kind of stuff) you can see that although she is sort of looking to the side, her beak is pointing straight at the camera. Yeah, it shouldn't do that.
With a bit of effort (i.e. a sunflower seed bribe) I caught hold of her and brought her down to the house where we could take a better look at her. We found that her beak was virtually torn off. It was in fact hanging by one small piece of flesh on the left side and every time she tossed her head or rubbed her beak on something, it would bleed. Hence, the blood drops and smears.
 |
| Hanging by a thread on the other side |
Some googling did not lend us much hope that this was fixable. One poor woman actually paid for surgery (!) to reattach a beak (it didn't work). The few successful beak issues we saw involved chips or minor breaks, not a full tear off. I admit my first instinct was to cull her and have chicken for Christmas dinner. Chris was a calmer head and suggested we move her into the garage where we could keep her isolated and see if she ate and drank.
We couldn't leave that hanging beak on her though so we snipped the last bit holding it in place and removed it. Now she had raw cartilage (not sure if that's what it actually is but it looked like your fingertip when you get a nail totally ripped off. Ick again) but at least it wasn't bleeding anymore. The good news is that she was immediately more comfortable and even started trying to peck around. Not that she could - it hurt any time she banged that raw flesh against anything. I gave her some water, some warm mash, and put her in a large kennel to keep her confined. I didn't want her running around the garage and getting more injured.
Do you know she laid an egg the next day? And continued to get better. The raw flesh turned sort of yellow-orange and firmed up. There was no "beak", no hard casing, and the top flesh did not meet up properly with the hard lower beak so it was tough for her to pick stuff up off the ground. But she tried and she ate/drank and continued to lay eggs. Finally we reintroduced her to the flock and quickly found that she'd lost all of her status. She was now the lowest of the low. And the chicken that had been on the bottom? Was really glad to have someone else to peck at now. She'd chase Bunty around the coop and jab at her. Bunty just kept her head averted and tried not to get hit on the beak.
After a while, things settled out and Bunty stayed on the bottom of the pecking order. Then in February I again found blood in the coop (this is a horrible way to start your morning by the way). It didn't take nearly as long to find the issue as Bunty was bleeding heavily from a torn comb. How'd it get torn? Who knows - I've had two separate flocks in this coop and never an injury but chickens are awesome at finding something to cut themselves on.
So back to the house Bunty went. This time the bleeding was quite a bit worse (i.e. constant) and she wouldn't stop scratching at it and shaking her head. Which would send blood flying in all directions. My utility room looked like an abattoir. Since binding a chicken's head isn't exactly possible I decided to wash her up as best I could then I put her in a small kennel, covered it with a towel, and shut her in a dark room. I offered food and water but basically kept her calm and confined and in the dark for two days. And it worked. Her comb went from pale pink and totally flopped over to blushing and starting to stand. Then we moved her to the garage where she could have some room to move around and keep away from the other chickens. She settled in, laid an egg for the first time in days, and kept Chris company whenever he was in the workshop. After another couple days, back to the flock she went.
She was still the bottom chicken but she was laying well and seemed content enough. I couldn't see anything happening with her beak; it just seemed to toughen up so that she could use it well. The fleshy top part still didn't meet the bottom hard beak, but she was able to eat and peck and forage, so we just let her get on with it. Her comb healed up and turned red and everything looked okay.
Now it's spring and we just took this picture. The hard upper beak has regrown. Which I flat out did not think was possible. And she has regained her spot as top chicken. Shoot, she even chases off Cooper if the dog gets too interested in the scratch feed. It's amazing.
 |
| That is a real beak! |
 |
| Queen of the coop |
But that's 2 lives used up so far. Not sure how many more she's got...