This week has been magical. Perfect Spring weather - warm sun, cool breeze, rainy nights. Perfect.
I've (finally) planted my peas; built up parts of the flower garden with rotting logs, leaves, and new soil; put in some gorgeous pansies; painted the new beehive; started a stone garden wall; planted a Mulberry tree; whittled door pulls; and cooked another de-boned turkey which then saved me from any additional cooking for days. Gotta love leftovers.
Mixed up in all the worth-noting projects are all the tasks that you get done but don't really mark as an accomplishment. And that's a shame because they take time, energy, and focus. Stuff like raking leaves, running errands, moving gravel, and cleaning up all the winter mess. Those individual things don't seem to amount to much but when looked at from the end of the week, boy do you realize how much better everything looks and how tired you feel. In a good way though.
Celebrate those little tasks!
Friday, April 26, 2019
Wednesday, April 24, 2019
Learning Some Embroidery
So far the class tally for the year has included pottery on the wheel, shoe making, bee keeping (Chris), weaving, and now - embroidery. The embroidery class was a quick, free (thank you Twig & Tale!) online course that just taught a few stitches but I had a good time learning them. I've done counted cross stitch and bargello but never really tried to do classic embroidery stitching. Now that I've tried it I plan to add some details to some of the sewing I do.
I used a linen pocket that I'd sewn up but never attached to my pinafore. Figured it was about time to actually use the darn thing.
The pattern is a simple vine & flower wreath that you transfer to your fabric. Basic supplies are fabric, hoop, pattern, needle, and floss of some kind.
 |
| Pattern and the first chain stitches |
 |
| Disappearing pattern |
I sewed the pocket onto my pinafore and left it as a double opening. My phone tucks in the tight inner pocket and I can use the outer layer of the pocket for quick access to whatever else I want to carry.
 |
| Finally attached! |
I haven't had to wash the apron since I added the pocket so I'm not positive how the embroidery stitching will hold up. I don't really feel like I secured it all that tightly on the back. If it loosens I'll just redo it and come up with a better way to knot off the threads.
Monday, April 22, 2019
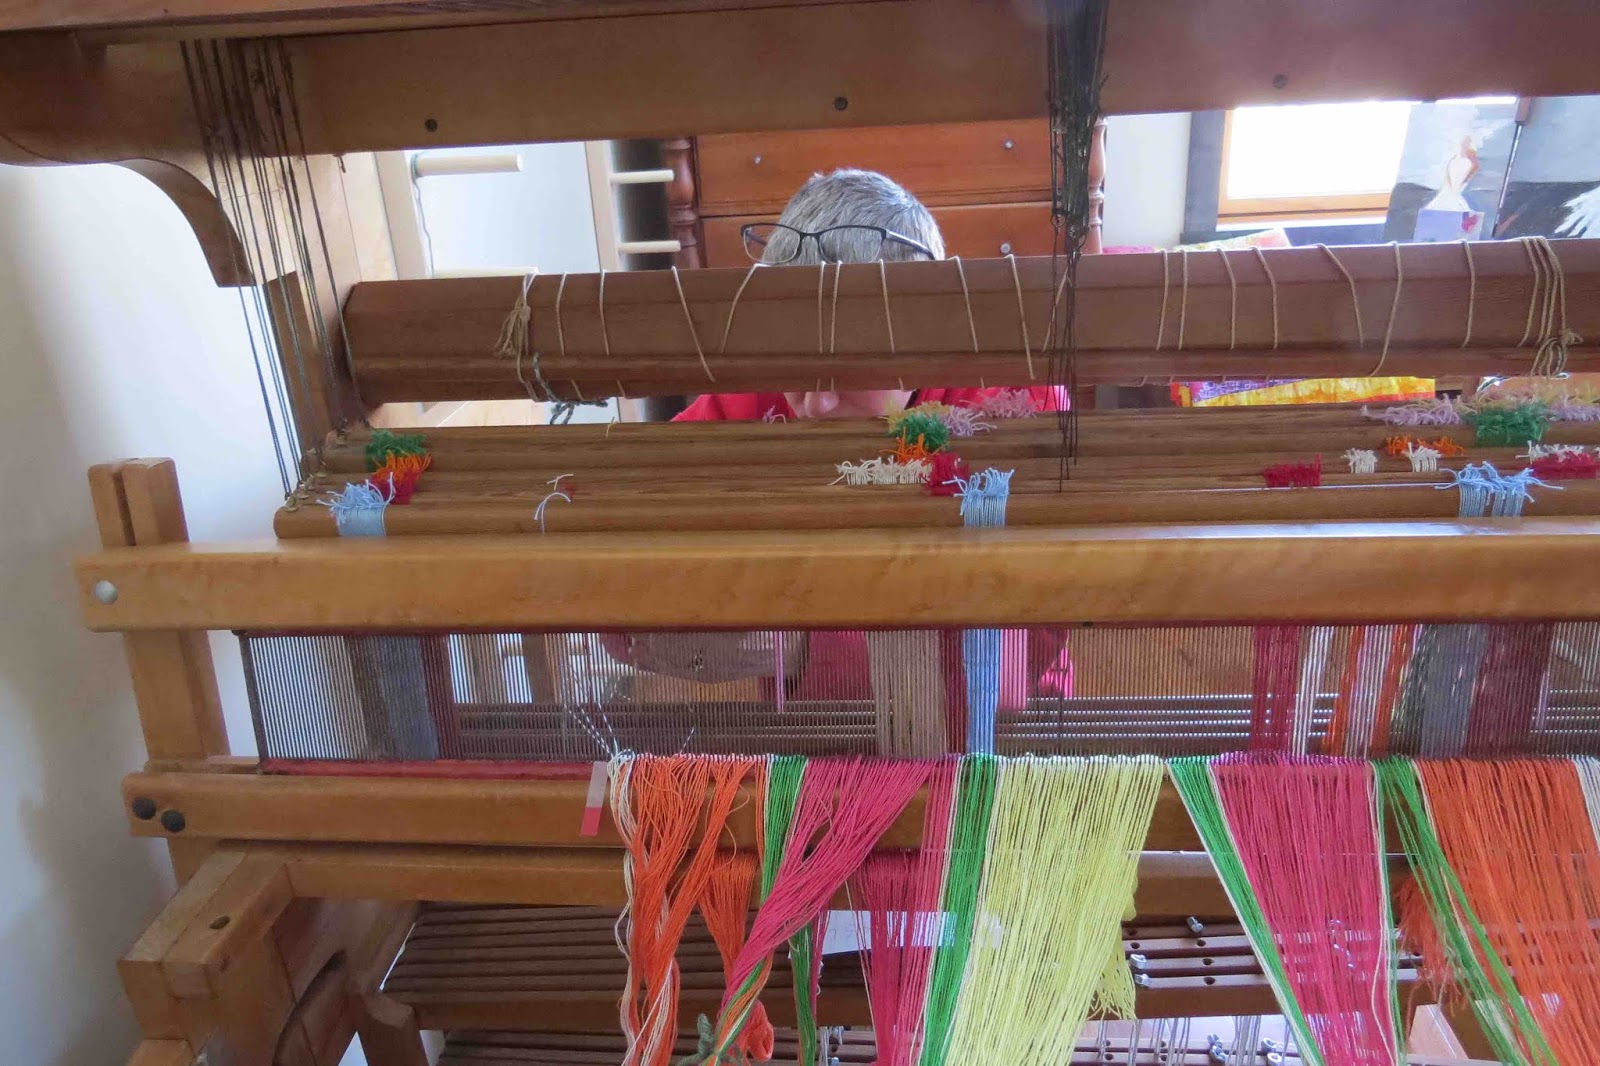
Sleying and threading
I'm finally ready to put the warp on the loom. I decided to dress it front-to-back because 1) that's how we did it in class 2) that's how my 1949 instructions say to do it and 3) I didn't want to have to make any more equipment (to dress back-to-front it helps enormously to have a raddle).
I brought my first chain of warp to the loom, wrapped it around the breast beam, inserted my fingers through the cross, and carefully cut away my end tie, counting ties, and choke. The warp was now released! And that's when I realized that I didn't have my sleying tool near to hand. Crap.
It's critical not to let go of that cross section of threads. That's the only way you have of making sure you don't mess up the pattern. So I unwrapped it from the breast beam, captured the chain in my free hand, and retrieved the tool. Happily I made it back to the loom without dropping anything. Whew!
 |
| Carefully holding the cross in my left hand |
 |
| Pulling a thread (or "end") through the reed |
 |
| Sleyed |
 |
| Bright warp |
 |
| Found a footstool just the right height |
 |
| Hiding behind the loom (and that darn twisted warp) |
 |
| Way more messy than it should be |
 |
| Cleaning up |
I tell myself that's how we learn - we screw up royally and have to fix it. And given the amount of time this has taken to correct, it's been a valuable lesson indeed.
Friday, April 19, 2019
Warping Board and bobbin winder
Once the loom was set up in the studio it was time to dress it. Hooray! Okay, how, precisely do you dress a loom?
Well, first you have to wind a warp. Cool. How do you do that?
Well, you can use all kinds of work-arounds (ladder back chairs, clamped broom handles?!?, the hands/arms of patient friends and family) or you can use a warping board. Awesome. Since I don't own ladder back chairs I figured we'd just build a warping board. Easy to find pictures and figure out what size would be good. Plus there was one at the shop where I took my weaving class and I had a photo of that to use too.
There were a lot of pegs to cut and holes to be drilled. Took a while as Chris used oak for the frame and that wood was hard! Had to keep stopping to let the drill bit cool down.
 |
| Drilling holes for the pegs |
Once all the holes were drilled Chris assembled the frame and banged in the pegs.
 |
| Cleverly protecting the wood floor |
 |
| Screwing in the frame |
 |
| I'll oil it this summer when ventilation is better |
 |
| Waste yarn as a guide |
 |
| Taking off the first section of warp |
Ta-dah! A powered bobbin winder that works great!
I've finished winding the warp and will now dress the loom. Wish me luck!
 |
| Amazing! |
Wednesday, April 17, 2019
De-boning a turkey
Back around Thanksgiving when turkeys were selling cheap at the grocery I saw this recipe for a boneless turkey. Now I seriously enjoy Chef John's recipe videos and this one made me really want to try it. So I grabbed an extra turkey and threw it in the freezer for a more experiment friendly time (after all, who wants to try an entirely new cooking method when you have guests coming for dinner? If you do - more power to you. That's not my cup of gravy.).
Anyway, the video is more about the technique than it is an actual recipe, so I figured out how to adapt Mom's stuffing recipe, thawed out the turkey, and got to work.
 |
| Wrestling an 18 lb bird. |
You start from the backbone and, working one side at a time, trim the meat from the bones. When you get to a joint (shoulder and thigh) you pop the bones out of the sockets and keep going. Just be sure not to cut through the belly skin.
 |
| One side down, one to go. |
 |
| Almost free |
 |
| Seeing what I've got to work with |
 |
| Grasping a thigh bone and yanking it free |
 |
| Seasoned and ready for stuffing. |
 |
| Golden brown! |
Monday, April 15, 2019
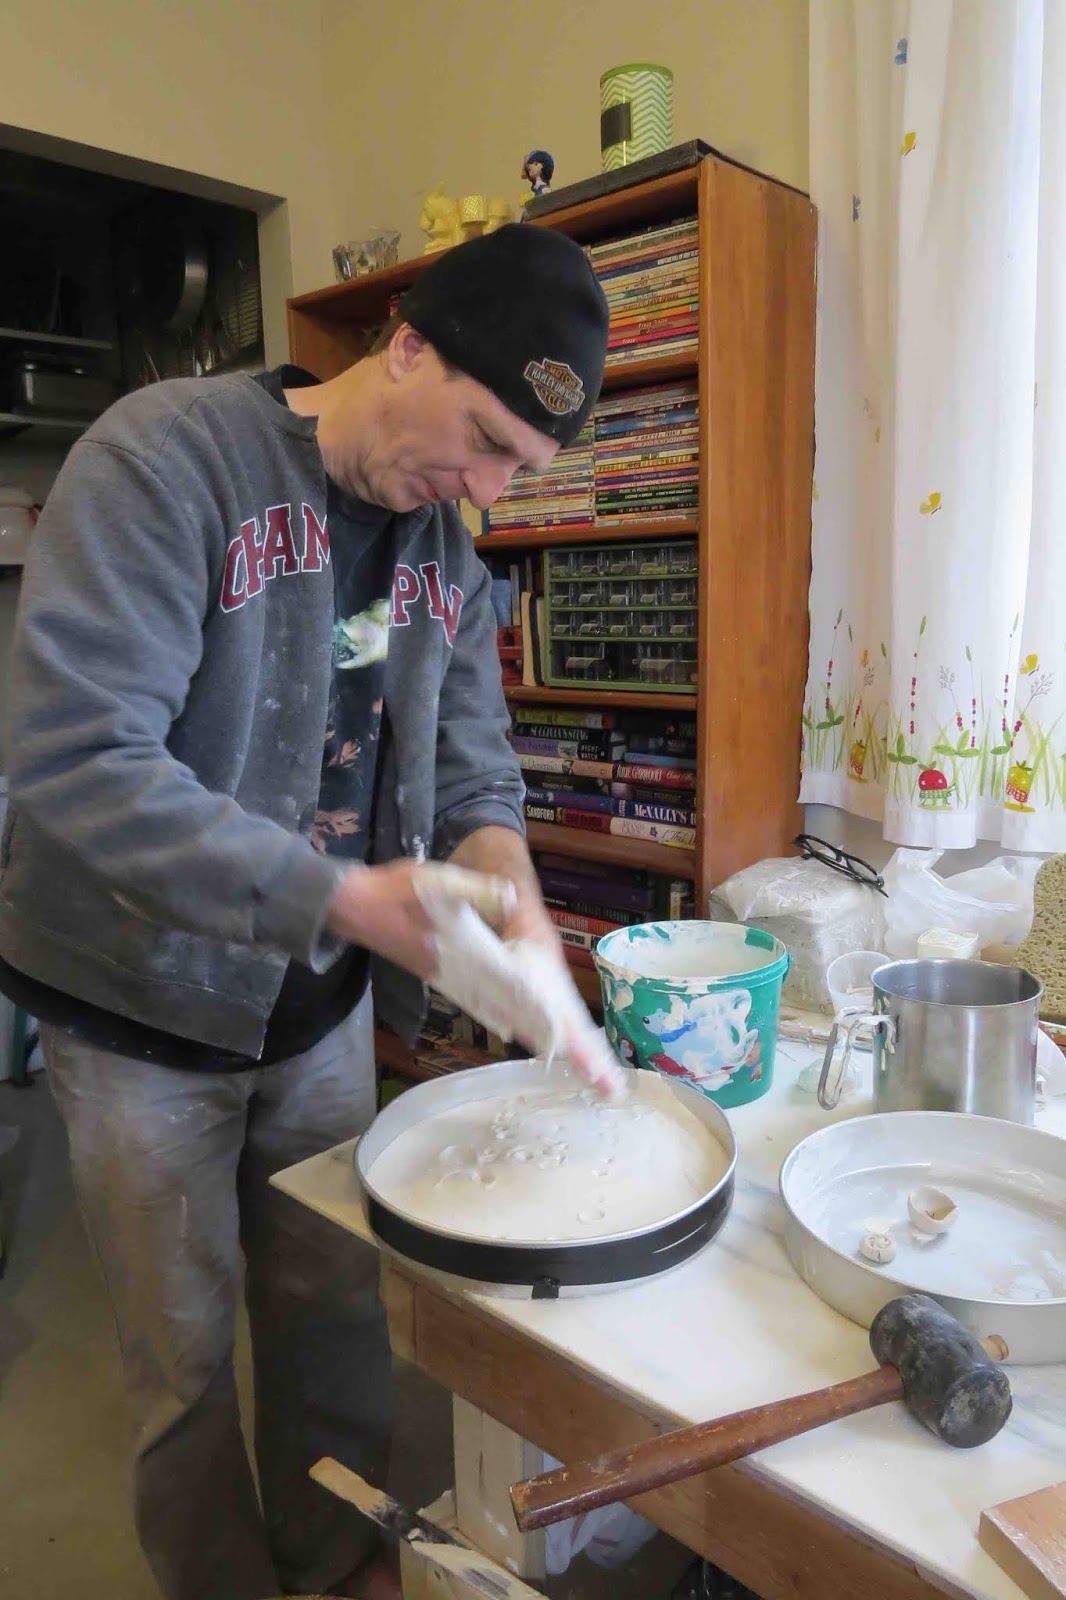
Plaster
One of the things you do when throwing pottery is make lots of wet clay. Something goes wrong on the wheel? Wet clay. Trimming a partially finished piece? Semi-wet clay. Just throwing in general? You'll wipe excess clay onto the rim of your water bowl regularly and get...wet clay.
The good news is all that wet clay is reclaimable. You just dump it in a bucket with water (wetter clay!) and let it get really juicy. Then you put it on plaster blocks and let water evaporate until the clay is back to a workable state. Wedge it and use it again. Very little waste in pottery - at least until you get a piece out of the kiln and realize you hate the glaze you put on it. That's a different story though.
We'd been drying the clay on our marble wedging table but that wasn't working very well. For one thing, it ate up way too much space. When all that clay was spread out you couldn't use the table for anything else. So Chris decided to make up some plaster blocks of our own.
A quick trip to HD netted some plaster of paris powder (much cheaper than the stuff sold at craft stores) and I sacrificed a cake pan that I didn't like but that just happened to be the exact size needed to fit perfectly on the wheel. See, as long as he was going to be playing with plaster blocks he figured he'd make some actual bats as well. He'd read that if you used a plaster bat you didn't need to actually cut your work off the bat to dry it. You just let it dry right on the bat and the plaster would wick the moisture away from the bottom. When ready to trim, just pop it off. We'll see how that goes and report back later.
He mixed up a bunch of plaster in the famous 5-gallon bucket. Man these things are handy. Put a good coating of petroleum jelly on the pan as a releasing agent, and poured it in.
 |
| Looks like cake batter, doesn't it? |
 |
| Getting it all out. |
 |
| Fits! |
So Chris cut the edges of the pan and and hinged it open. That worked!
 |
| You can just see the cut line at about 1 o'clock |
 |
| He used electrical tape to hold the pan together. |
 |
| Potential press molds |
 |
| Making a grab handle |
Thursday, April 11, 2019
Going, going, soon to be gone
It's spectacular how quickly the snow is melting off. In just two weeks we've gone from over a foot in the flats to bare ground.


 The driveway is holding up well but it's obvious we'll need to order stone again this year. I try to budget for a certain amount every year and I think we're going to have to play some catchup. Definitely some real mud holes out there.
 The streams are running bank full after a night and day of good rain. Cold temps in the late day means things freeze back up overnight and the runoff slows down. It's a great way to have the spring thaw happen - reduces the time spent in mud season.
We burned slightly more than average of our firewood. It was an early winter with snow hitting late October and temperatures staying wicked cold. December wood burning was more akin to February levels - three fires a day for a constantly burning stove load. Usually it's just a fire in the morning that we let die to coals, then another fire at night. Unfortunately, February was seasonably cold so lots of wood consumption occurred then too.
We're scrambling to finish those projects that seemed like we had all winter to do. Closet doors on the dressing area, pottery, sewing, weaving, building bee hives - great things to do while it's still cold and wet outside. Still, it'll be spring planting time soon. The garden is completely clear of snow and even the ground ice is thawing. Who knows, I may see garlic shoots coming up soon!
The chickens love getting out and scratching around. It was a bit cold out there but we managed to get all the way around the house. Plenty of time in the woods and I'm hoping they're eating lots of ticks.


 |
| Stream from the settling basin |
 |
| Same stream heading into the woods |
 |
| He kept the coffee safe though |
 |
| Hopefully the last year it's stacked like this |
 |
| Cooper says fewer photos and more walking |
 |
| Garden, future pit greenhouse, and stone pile for wall building |
 |
| A girl and her chickens |
Tuesday, April 2, 2019
March 2019 - 138
138. That's how many eggs I got from the six chickens in the month of March. I had mentioned that I wasn't thrilled with this flock and they apparently decided to prove me wrong.
We're now getting five or six eggs per day and breakfast is yummy indeed.
They're still bored with all the snow but the last few days have seen a dramatic reduction in the amount covering the ground. There are officially bare patches of dirt/grass at the edges of the driveway, near rock walls, and at the base of trees. I figure it'll all be gone except in the deep ditches by this weekend. Woot!
It's even been warm enough that I've let them out to scratch at that fresh dirt and grass. I can sit in a chair, read a book, and keep on eye on them. After losing most of the last flock to marauding foxes I'm afraid to just let them free-range. Fortunately it's not exactly a hardship to sit in the sun and listen to them coo.
Subscribe to:
Posts (Atom)